

Why Homemade Beats Store-Bought
We’ve all been there. You grab an energy bar off the shelf, hoping for a healthy boost, only to be met with a chalky texture and a surprising amount of sugar. While convenient, many commercial bars are filled with artificial ingredients and don't deliver the clean fuel your body needs. It’s a common frustration for anyone focused on clean eating.
Making your own bars is the perfect answer. When you take control of your kitchen, you get to decide exactly what goes into your snack. This means no hidden sugars, no strange fillers, just pure, wholesome ingredients that align with your goals. These are fantastic clean eating snack ideas that you can trust completely.
You also get to maximize the protein. Many store-bought options are surprisingly low in protein, but with a homemade recipe, you can create genuinely high protein vegan snacks that support muscle recovery and keep you feeling full. Best of all, nothing compares to the fresh taste of a bar made just the way you like it. This simple weekly habit is not just cost-effective; it’s an empowering way to support your active lifestyle.
The Building Blocks of a Perfect Vegan Bar
Creating the perfect energy bar is less about a complicated recipe and more about understanding a few key components. Once you know the role each ingredient plays, you can craft a snack that’s perfectly balanced for your needs.
The Protein Foundation
The heart of any great protein bar is, of course, the protein. A high-quality vegan protein powder is non-negotiable for hitting that 20-25g of protein per serving sweet spot. This is how to use vegan protein powder to transform a simple snack into a powerful recovery tool. Choosing from the best protein powders ensures your bars will have a smooth, non-gritty texture, solving a common complaint with many plant-based options. Our powders are specifically designed to blend seamlessly, giving you a creamy consistency every time.
Natural Binders and Sweeteners
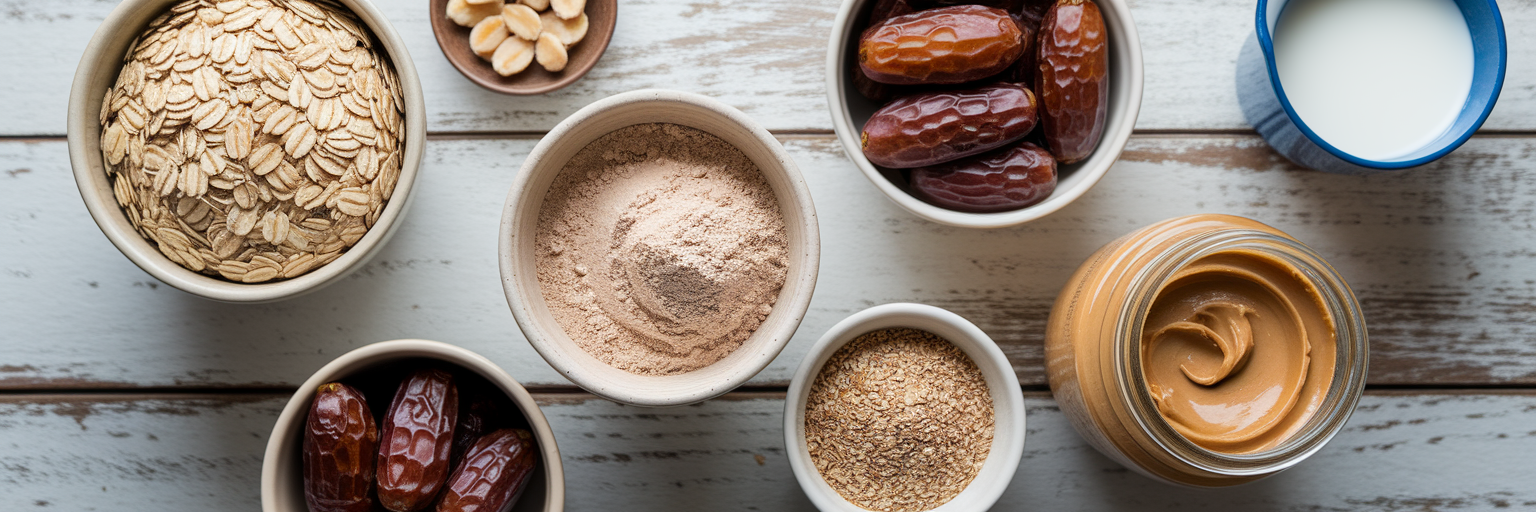
To hold everything together and add natural sweetness, we turn to two powerhouse ingredients: Medjool dates and nut butter. Pitted dates provide a caramel-like sweetness and a sticky texture that acts as the perfect glue. Nut butters, like almond or peanut butter, contribute healthy fats, rich flavor, and additional binding power. This combination completely eliminates the need for refined sugars or artificial syrups, keeping your bars clean and wholesome.
The Base and Texture Enhancers
For sustained energy and a satisfying chew, rolled oats are the ideal base. They provide complex carbohydrates that fuel you longer without a sugar crash. To ensure your bars hold their shape, ground flaxseed is a secret weapon. When mixed with liquid, it forms a gel that binds the ingredients together, much like an egg would. Plus, it adds a valuable dose of omega-3 fatty acids. A small splash of unsweetened almond milk can help bring the dough together to achieve that perfect, workable consistency.
A Simple No-Bake Protein Bar Recipe
Ready to make your own? This simple no bake energy bar recipe requires minimal equipment and comes together in minutes. It’s the perfect starting point for creating delicious, fuel-packed snacks.
You will only need:
- A food processor
- An 8x8-inch pan
- Parchment paper
- A spatula
Here are the core ingredients:
- 1 cup rolled oats
- ½ cup Beyond Good Foods Vegan Protein Powder (vanilla or unflavored)
- 12 pitted Medjool dates, soaked in warm water for 10 minutes if not soft
- ½ cup natural, creamy peanut butter
- 2-3 tablespoons unsweetened almond milk
Follow these simple steps:
- Add the rolled oats to your food processor and pulse a few times until they form a coarse flour.
- Add the soaked and drained dates. Blend until a crumbly, sand-like mixture forms.
- Add the protein powder, peanut butter, and 2 tablespoons of almond milk. Blend again until a sticky, thick dough comes together. If it seems too dry, add the last tablespoon of milk.
- Line your 8x8-inch pan with parchment paper. Press the mixture firmly and evenly into the pan using a spatula or your hands. This step is key for dense, chewy bars.
- Chill in the refrigerator for at least one hour to allow the bars to set. Once firm, slice into bars and enjoy!
As Yumna Jawad at FeelGoodFoodie.net confirms, a single batch can produce bars with impressive nutritional profiles, making them a truly effective post-workout snack. Once you master this base, you can explore other 3 easy vegan protein recipes you'll actually crave to keep your snack routine exciting.
Customizing Your Flavors
The best part about homemade vegan protein bars is making them your own. Think of the base recipe as a blank canvas for your favorite flavors. Many popular online recipes, like those on ririsrecipes.com, encourage using add-ins to personalize each batch. Here are a few ideas to get you started:
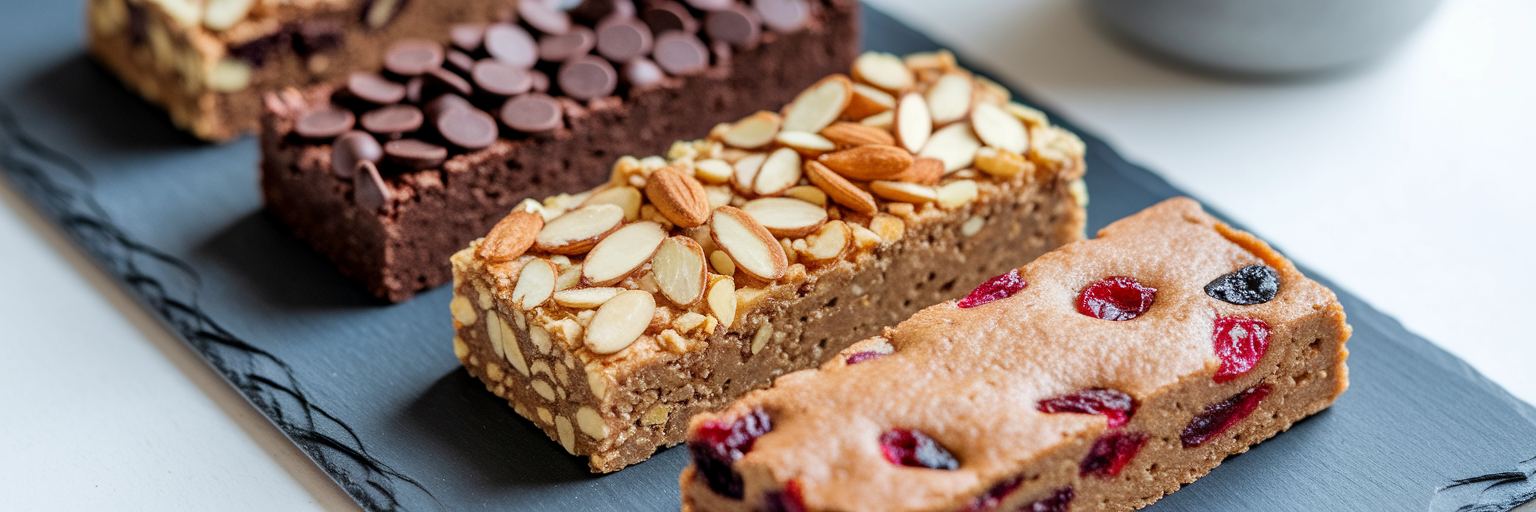
- Chocolate Peanut Butter: Add 2 tablespoons of unsweetened cocoa powder to the dry ingredients. For an extra treat, fold in a handful of vegan dark chocolate chips after blending.
- Vanilla Almond: Use a vanilla-flavored protein powder, swap the peanut butter for almond butter, and add a teaspoon of pure vanilla extract. Top with slivered almonds before chilling for a nice crunch.
- Cranberry Orange: With a vanilla or unflavored protein base, add ¼ cup of dried cranberries and 1 teaspoon of fresh orange zest. The bright, tangy flavor is incredibly refreshing.
The easiest way to achieve a rich, decadent flavor is by using a pre-flavored powder like our Chocolate Vegan Protein, which blends perfectly into the recipe and does the flavor work for you.
| Flavor Profile | Protein Powder Type | Key Add-In | Optional Topping |
|---|---|---|---|
| Chocolate Peanut Butter | Chocolate or Unflavored | 2 tbsp Cocoa Powder | Vegan Chocolate Chips |
| Vanilla Almond | Vanilla | 1 tsp Vanilla Extract | Slivered Almonds |
| Cranberry Orange | Vanilla or Unflavored | 1 tsp Orange Zest & ¼ cup Dried Cranberries | White Chocolate Drizzle |
| Mocha Chip | Chocolate or Vanilla | 1 tsp Instant Espresso Powder | Cacao Nibs |
Note: This table provides a starting point for experimentation. Adjust add-ins based on personal taste and desired texture.
Getting the Texture Just Right
Does your mixture feel a little off? Don’t worry, it’s an easy fix. The texture of your dough is simple to adjust.
- If the mixture is too dry and crumbly, add more plant-based milk, one tablespoon at a time. Blend between each addition until the dough just comes together into a sticky ball.
- If the mixture is too wet or sticky, add a tablespoon of rolled oats or protein powder to help absorb the excess moisture. This will make the dough much easier to handle.
As food blogger Jessica Hylton explains, the combination of dates and a binder like ground flaxseed is crucial for creating that perfect chewy texture. But the most important step for a firm, satisfying bar is pressing the mixture tightly into the pan. Use the back of a spatula or a flat-bottomed glass to compact the dough as much as possible. This simple action is what prevents the bars from falling apart and ensures a dense, chewy bite every time.
Smart Storage for On-the-Go Fuel
Once your bars are sliced, proper storage keeps them fresh and ready for whenever you need a boost. Here’s how to make them fit into your busy schedule:
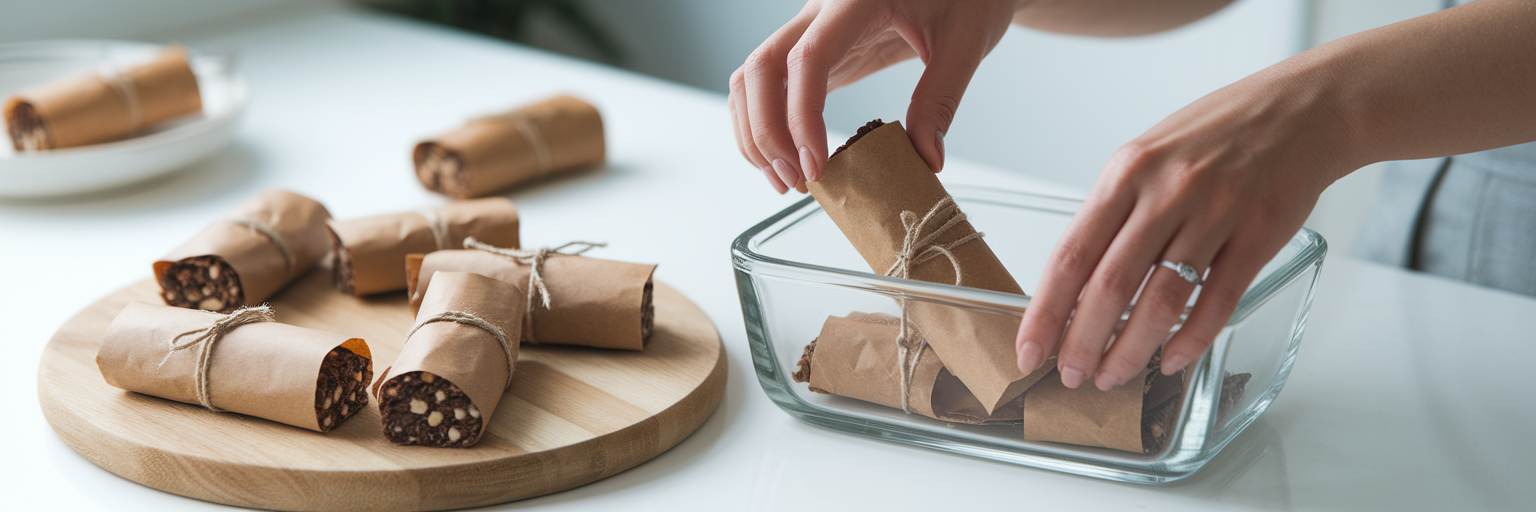
- For the week ahead: Store the bars in an airtight container in the refrigerator. They will stay fresh and delicious for up to seven days.
- For long-term fuel: Wrap each bar individually in parchment paper and place them in a freezer-safe bag. They can be frozen for up to three months, making batch-prepping a breeze.
Just let a frozen bar thaw at room temperature for about 10-15 minutes before eating. It’s the ultimate solution for having healthy, high protein vegan snacks ready to go. Now that you have your snacks sorted, explore our full range of clean, plant-based products to support all your wellness goals.